How do challenges work
1. Setting up your Git repository
First off, we’ll create a git repository for you. Like this one. You’ll use this repository to submit code to CodeCrafters to run tests. You can choose what language to use at this point. You can freely switch between languages whenever you want.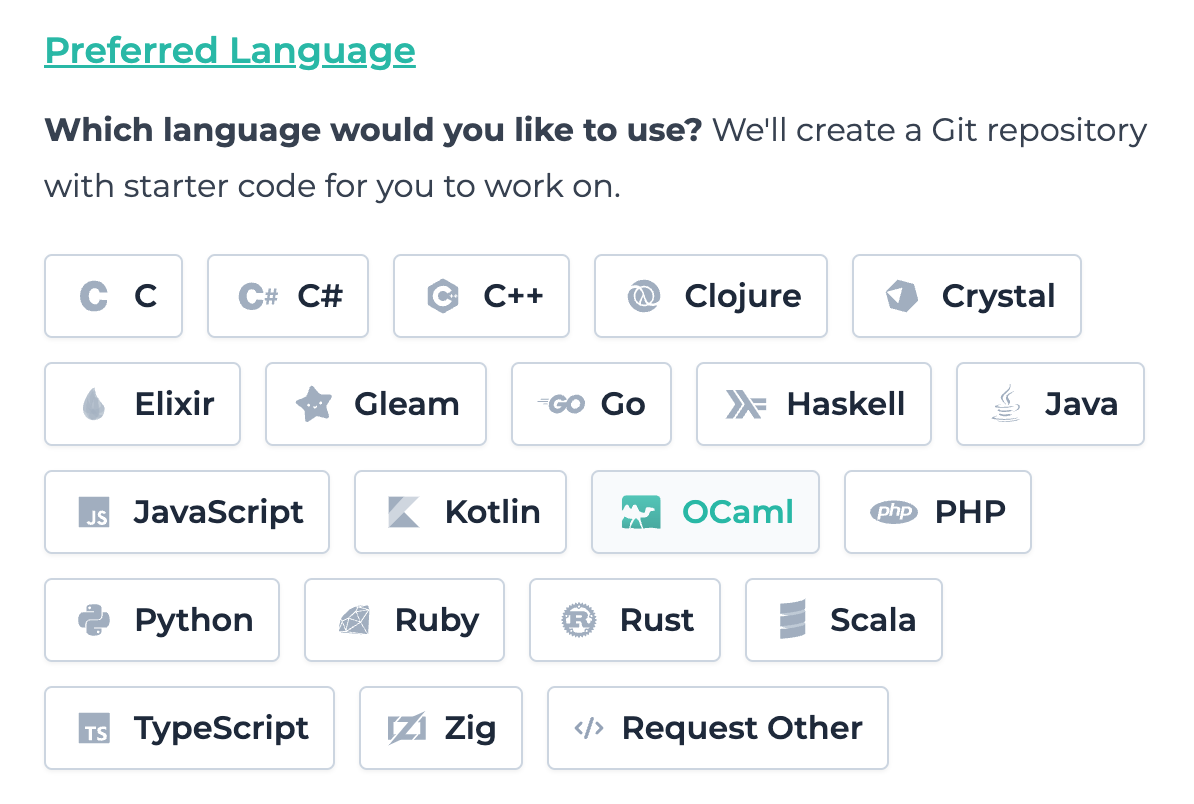
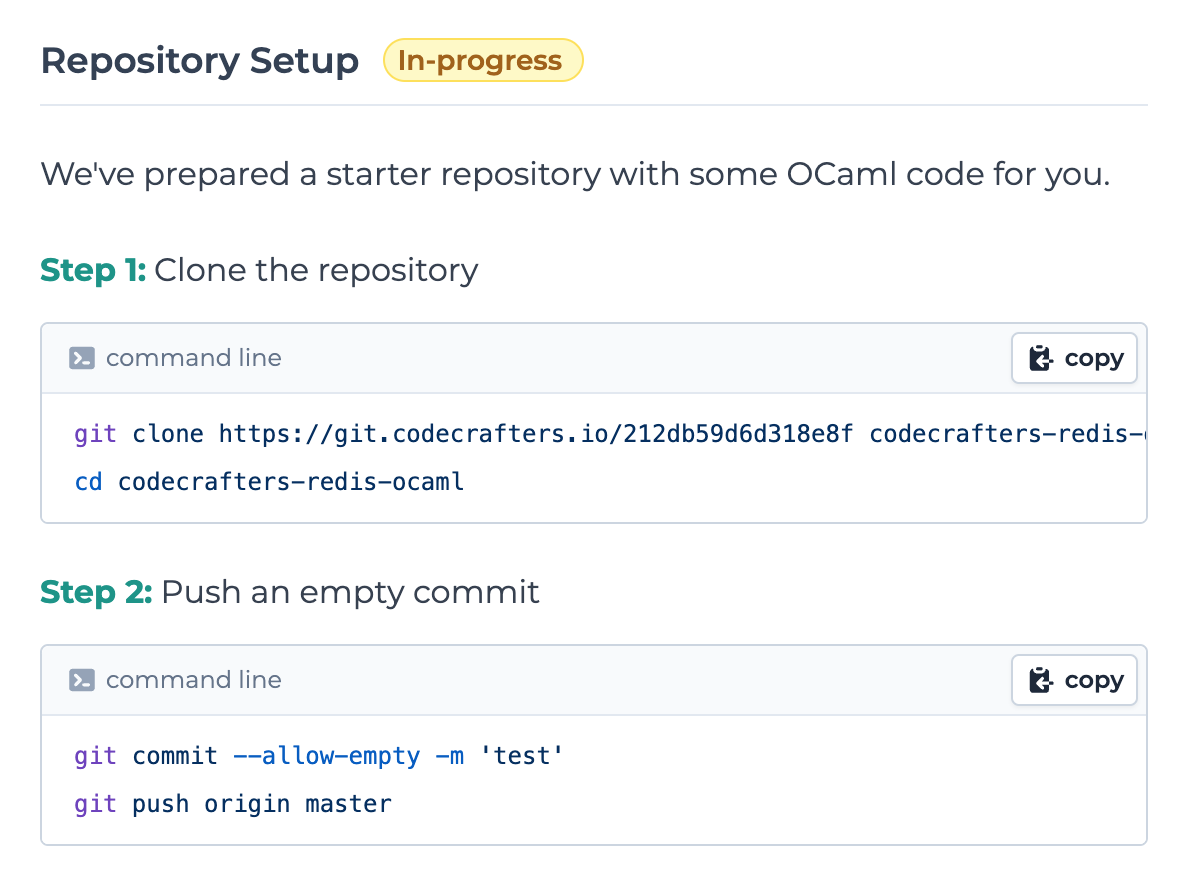
How to run git commands?
You need to run
git commands on your local machine.1
Open Terminal on your system
If you’re on Windows, you can use PowerShell.
2
Set up Git
Make sure Git is installed and set up properly.
3
Run git commands
Copy and paste the commands into your terminal, and press enter.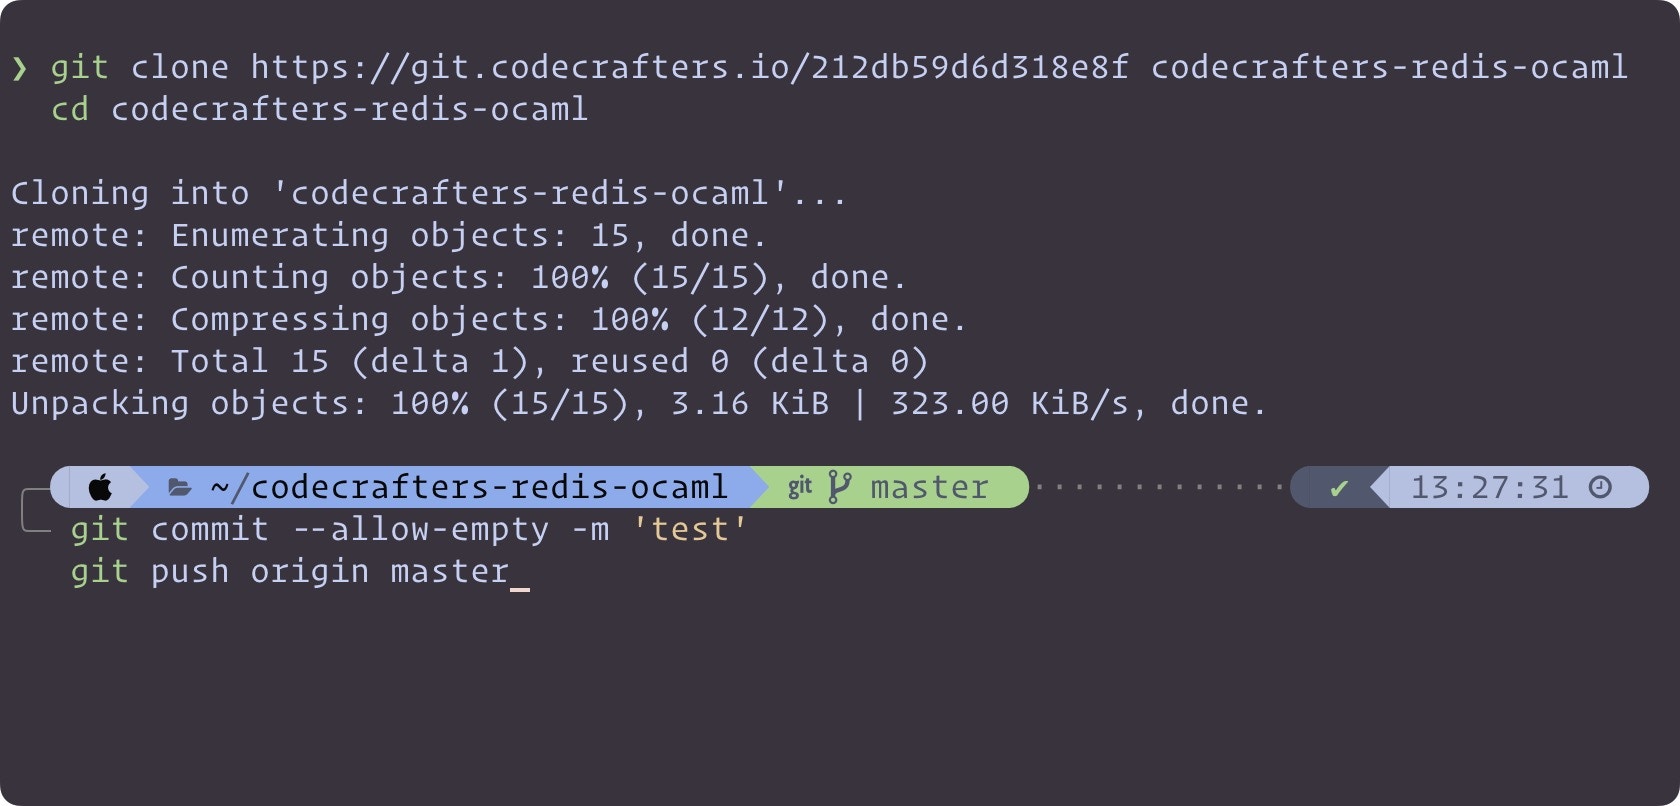
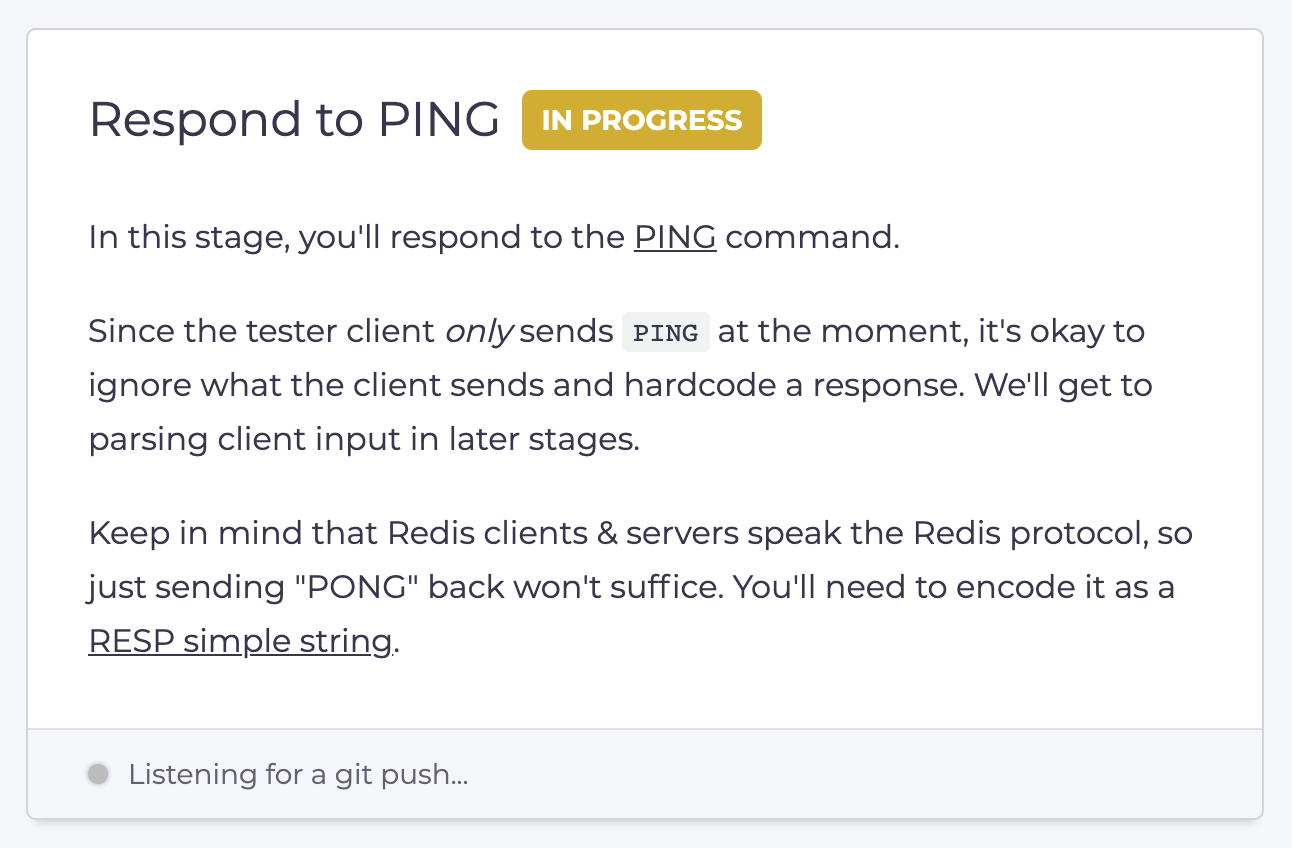
2. First Stage Instructions
You’ll now see instructions for the first stage.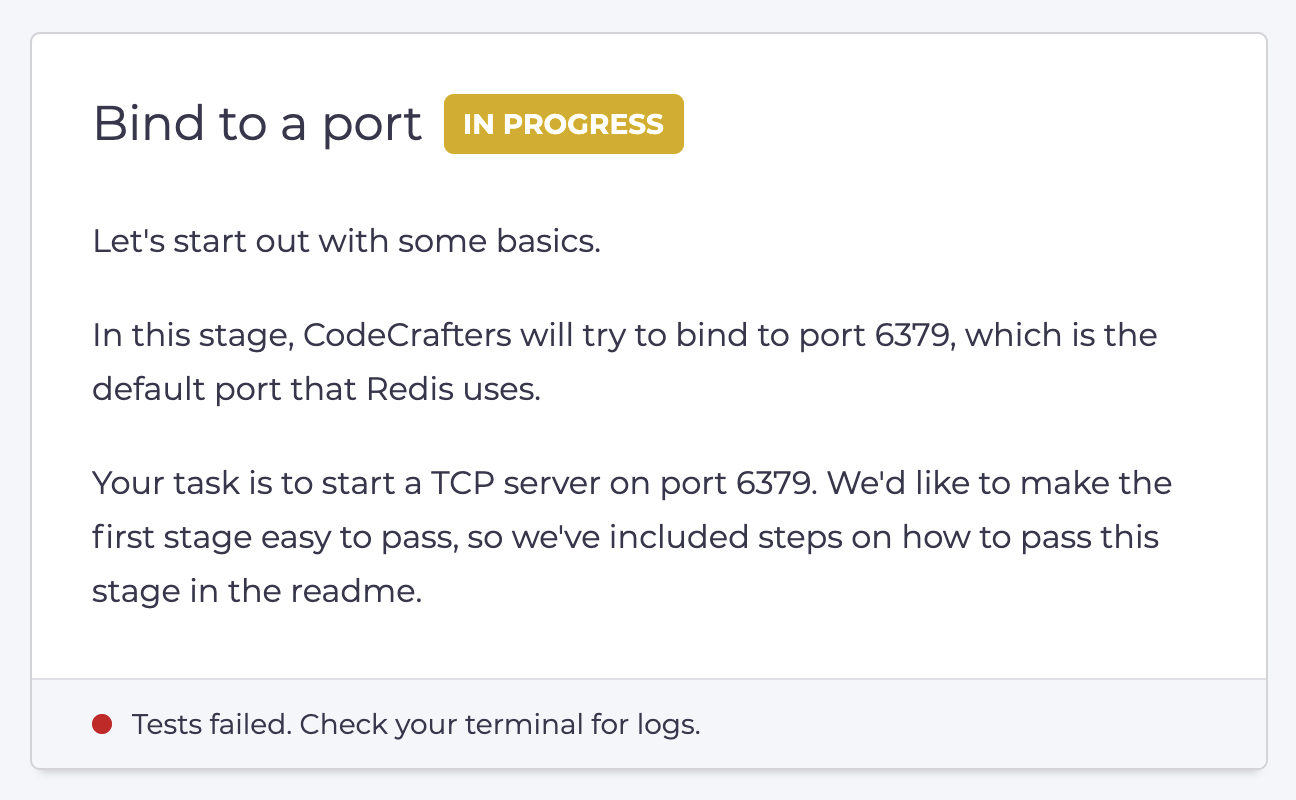

3. Passing the first stage
The README will contain instructions on how to pass the first stage. We always include this along with your starter repository, so that it’s easy to get started.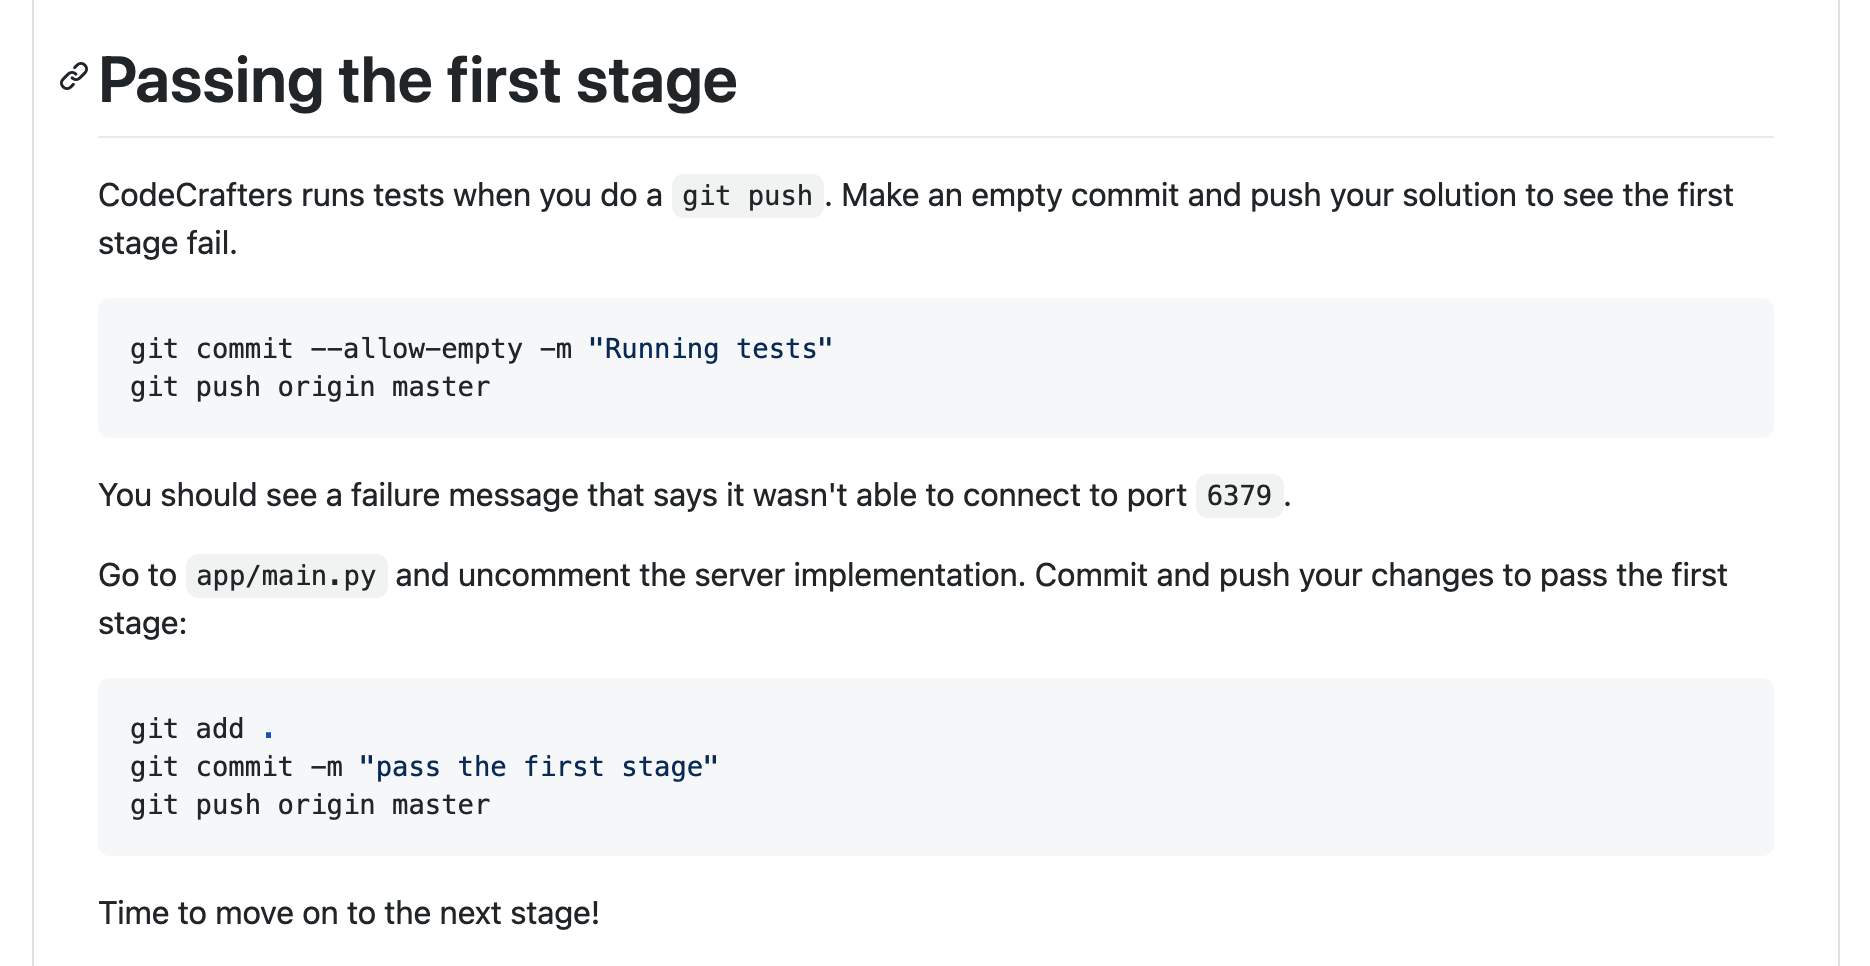
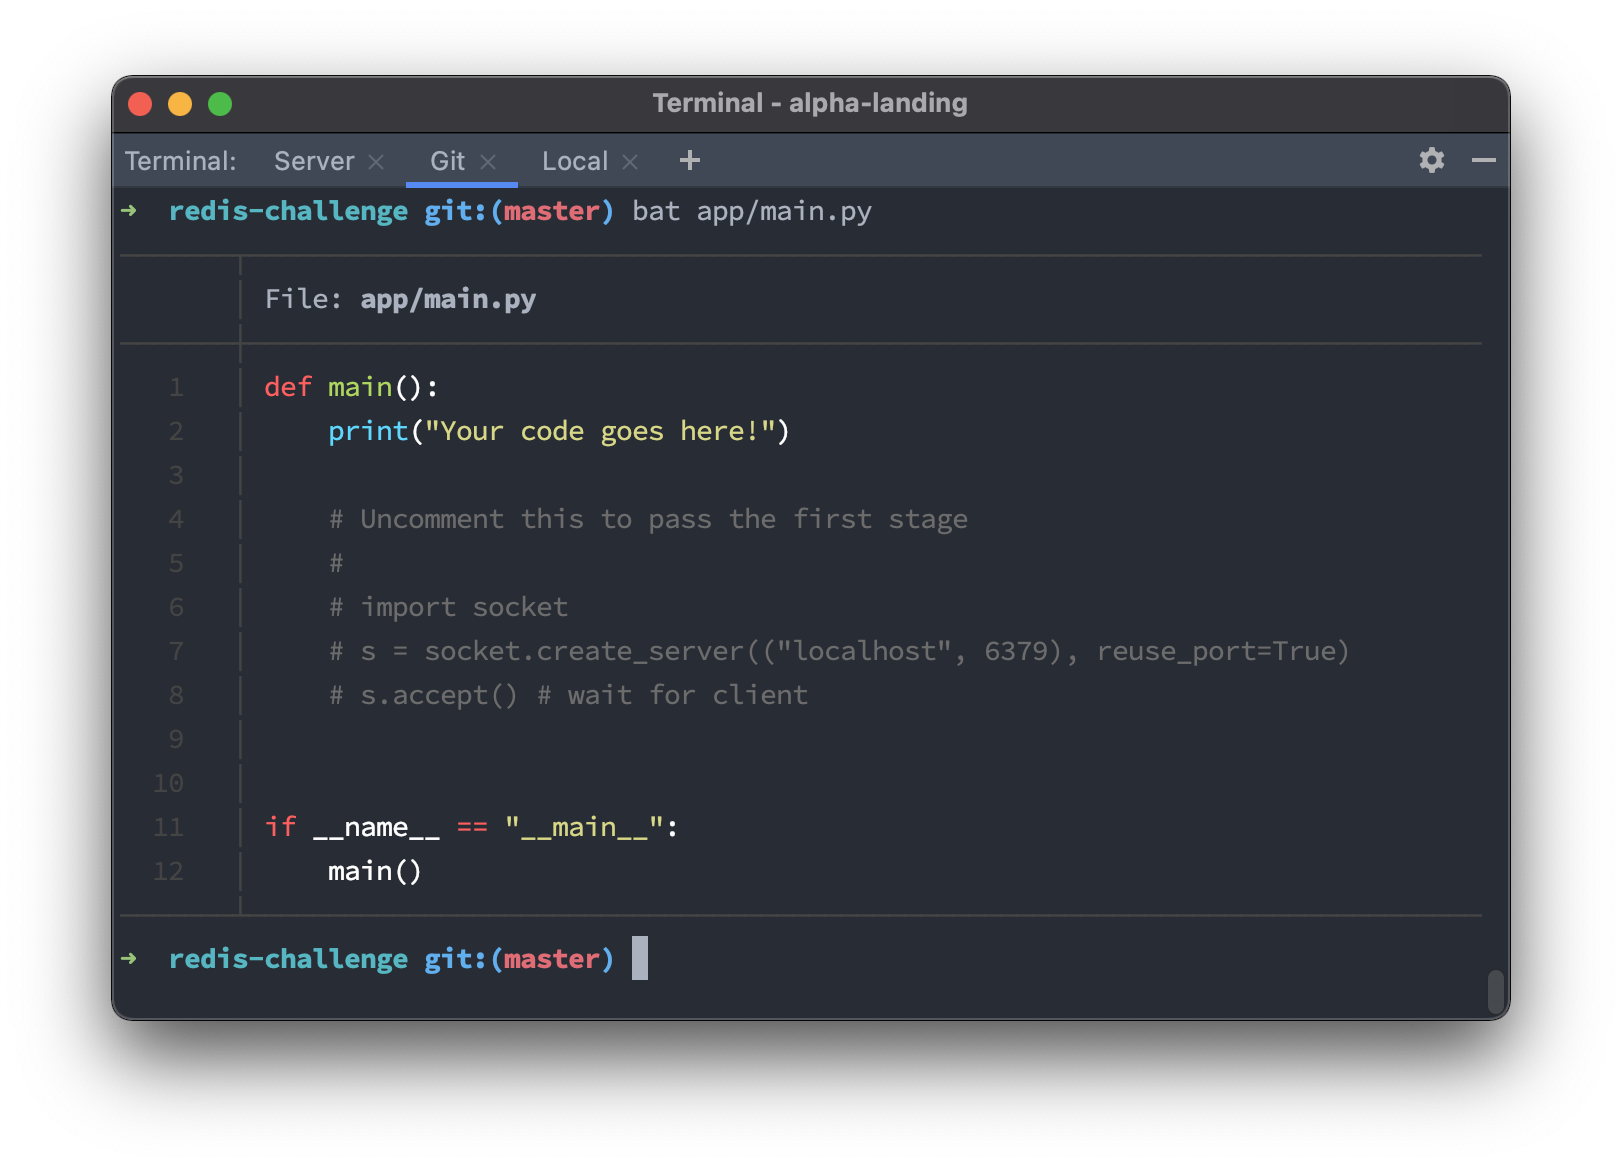
app/main.py as suggested above, you’ll see some commented out code:

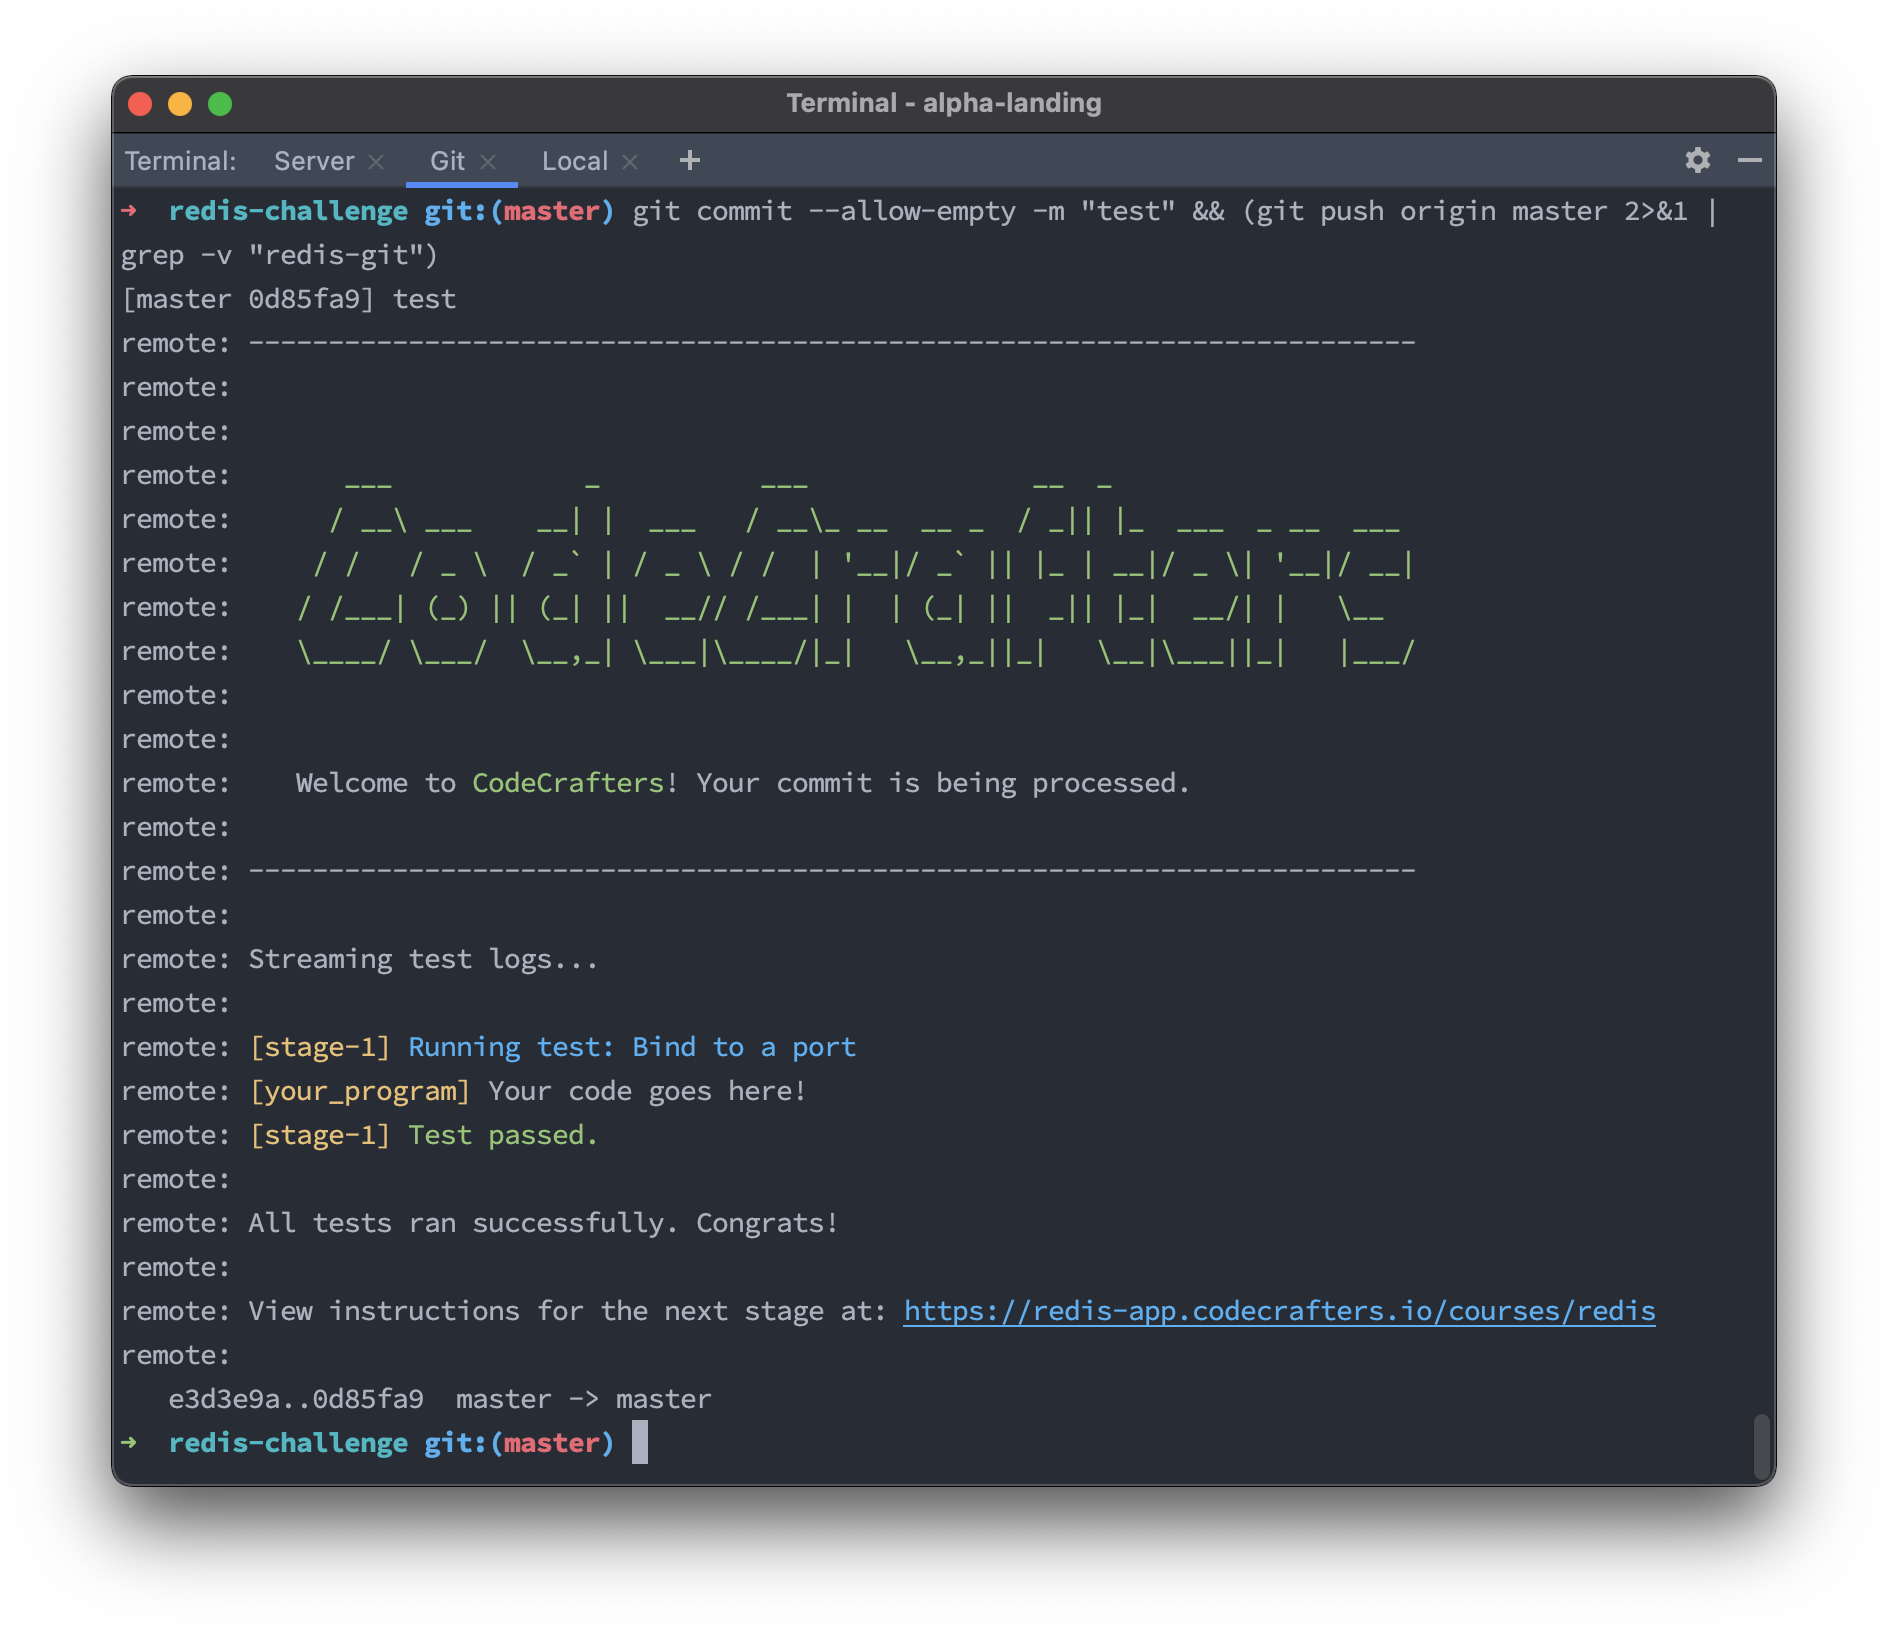
4. Next stage
When you head back to the web UI, you’ll now see instructions for the second stage: