1. Run course-sdk add-language <language>
Clone build-your-own-<challenge>
For instance, if you’re adding support for the Kafka challenge, clone the build-your-own-kafka repository.
Run course-sdk add-language <language>
a. Install course-sdk if it’s not already installed.b. In the cloned challenge repository, run the following command:
Check available languages
here.
2. Edit starter code
The starter code will be copied tostarter_templates/<language>.
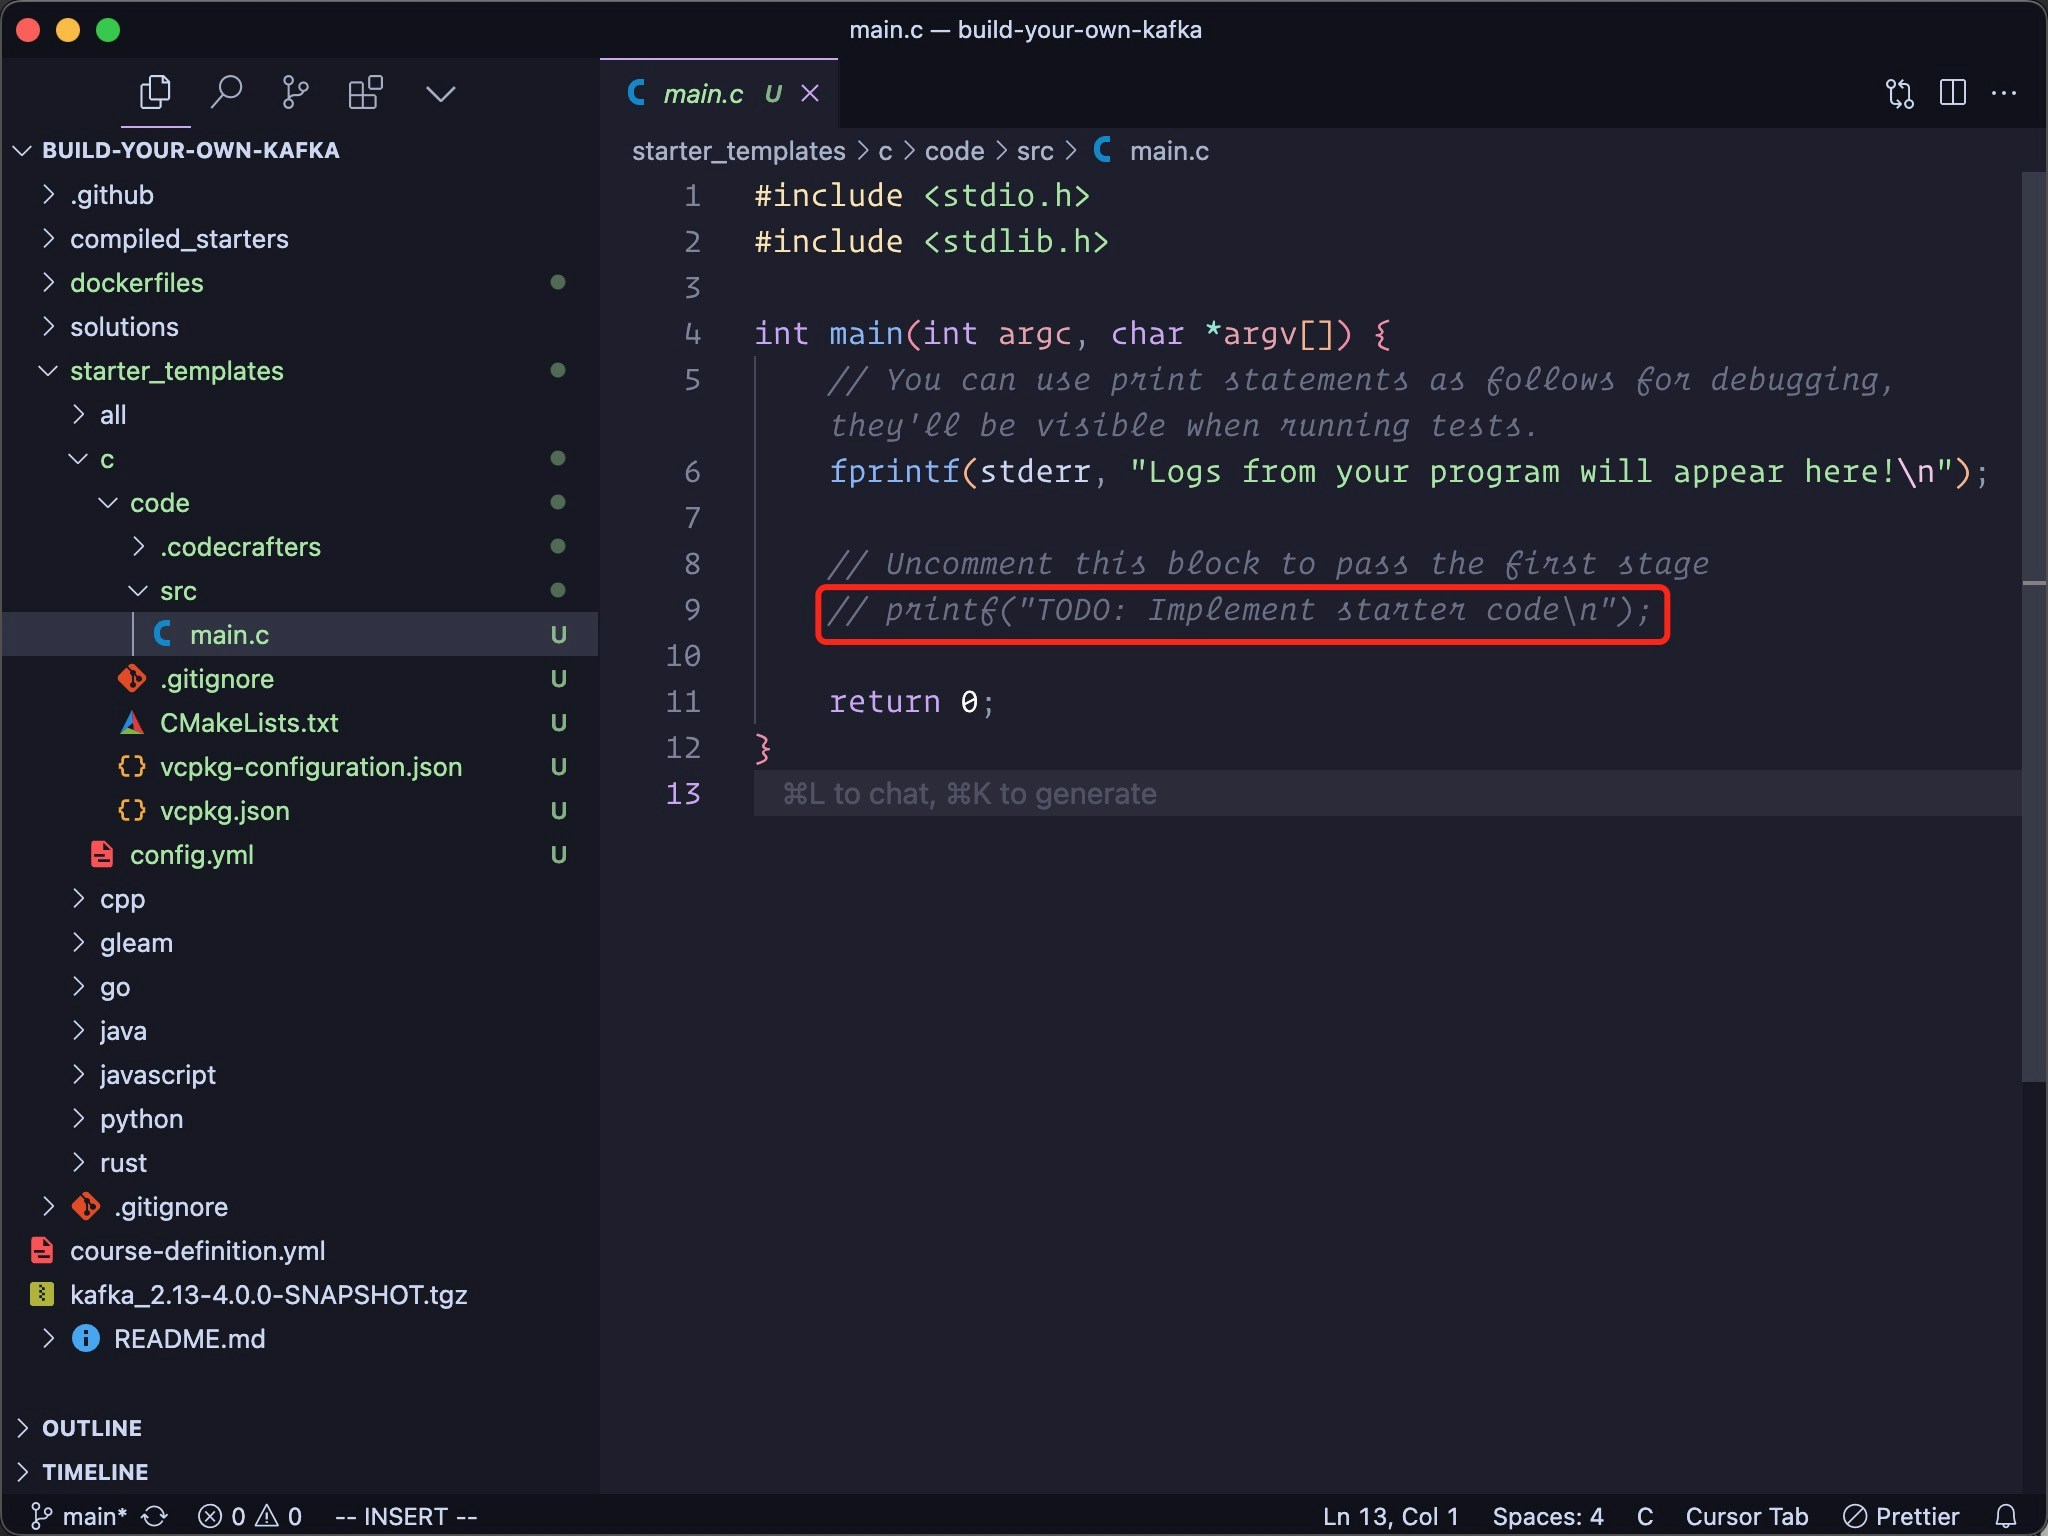
Suppose you’re adding C support, open and edit starter_templates/c/code/src/main.c:

3. Run course-sdk test <language>
We have comprehensive CI tests in place to ensure that the starter code and Dockerfile for each language are valid.
In the cloned challenge repository, run the following command:
First stage solution
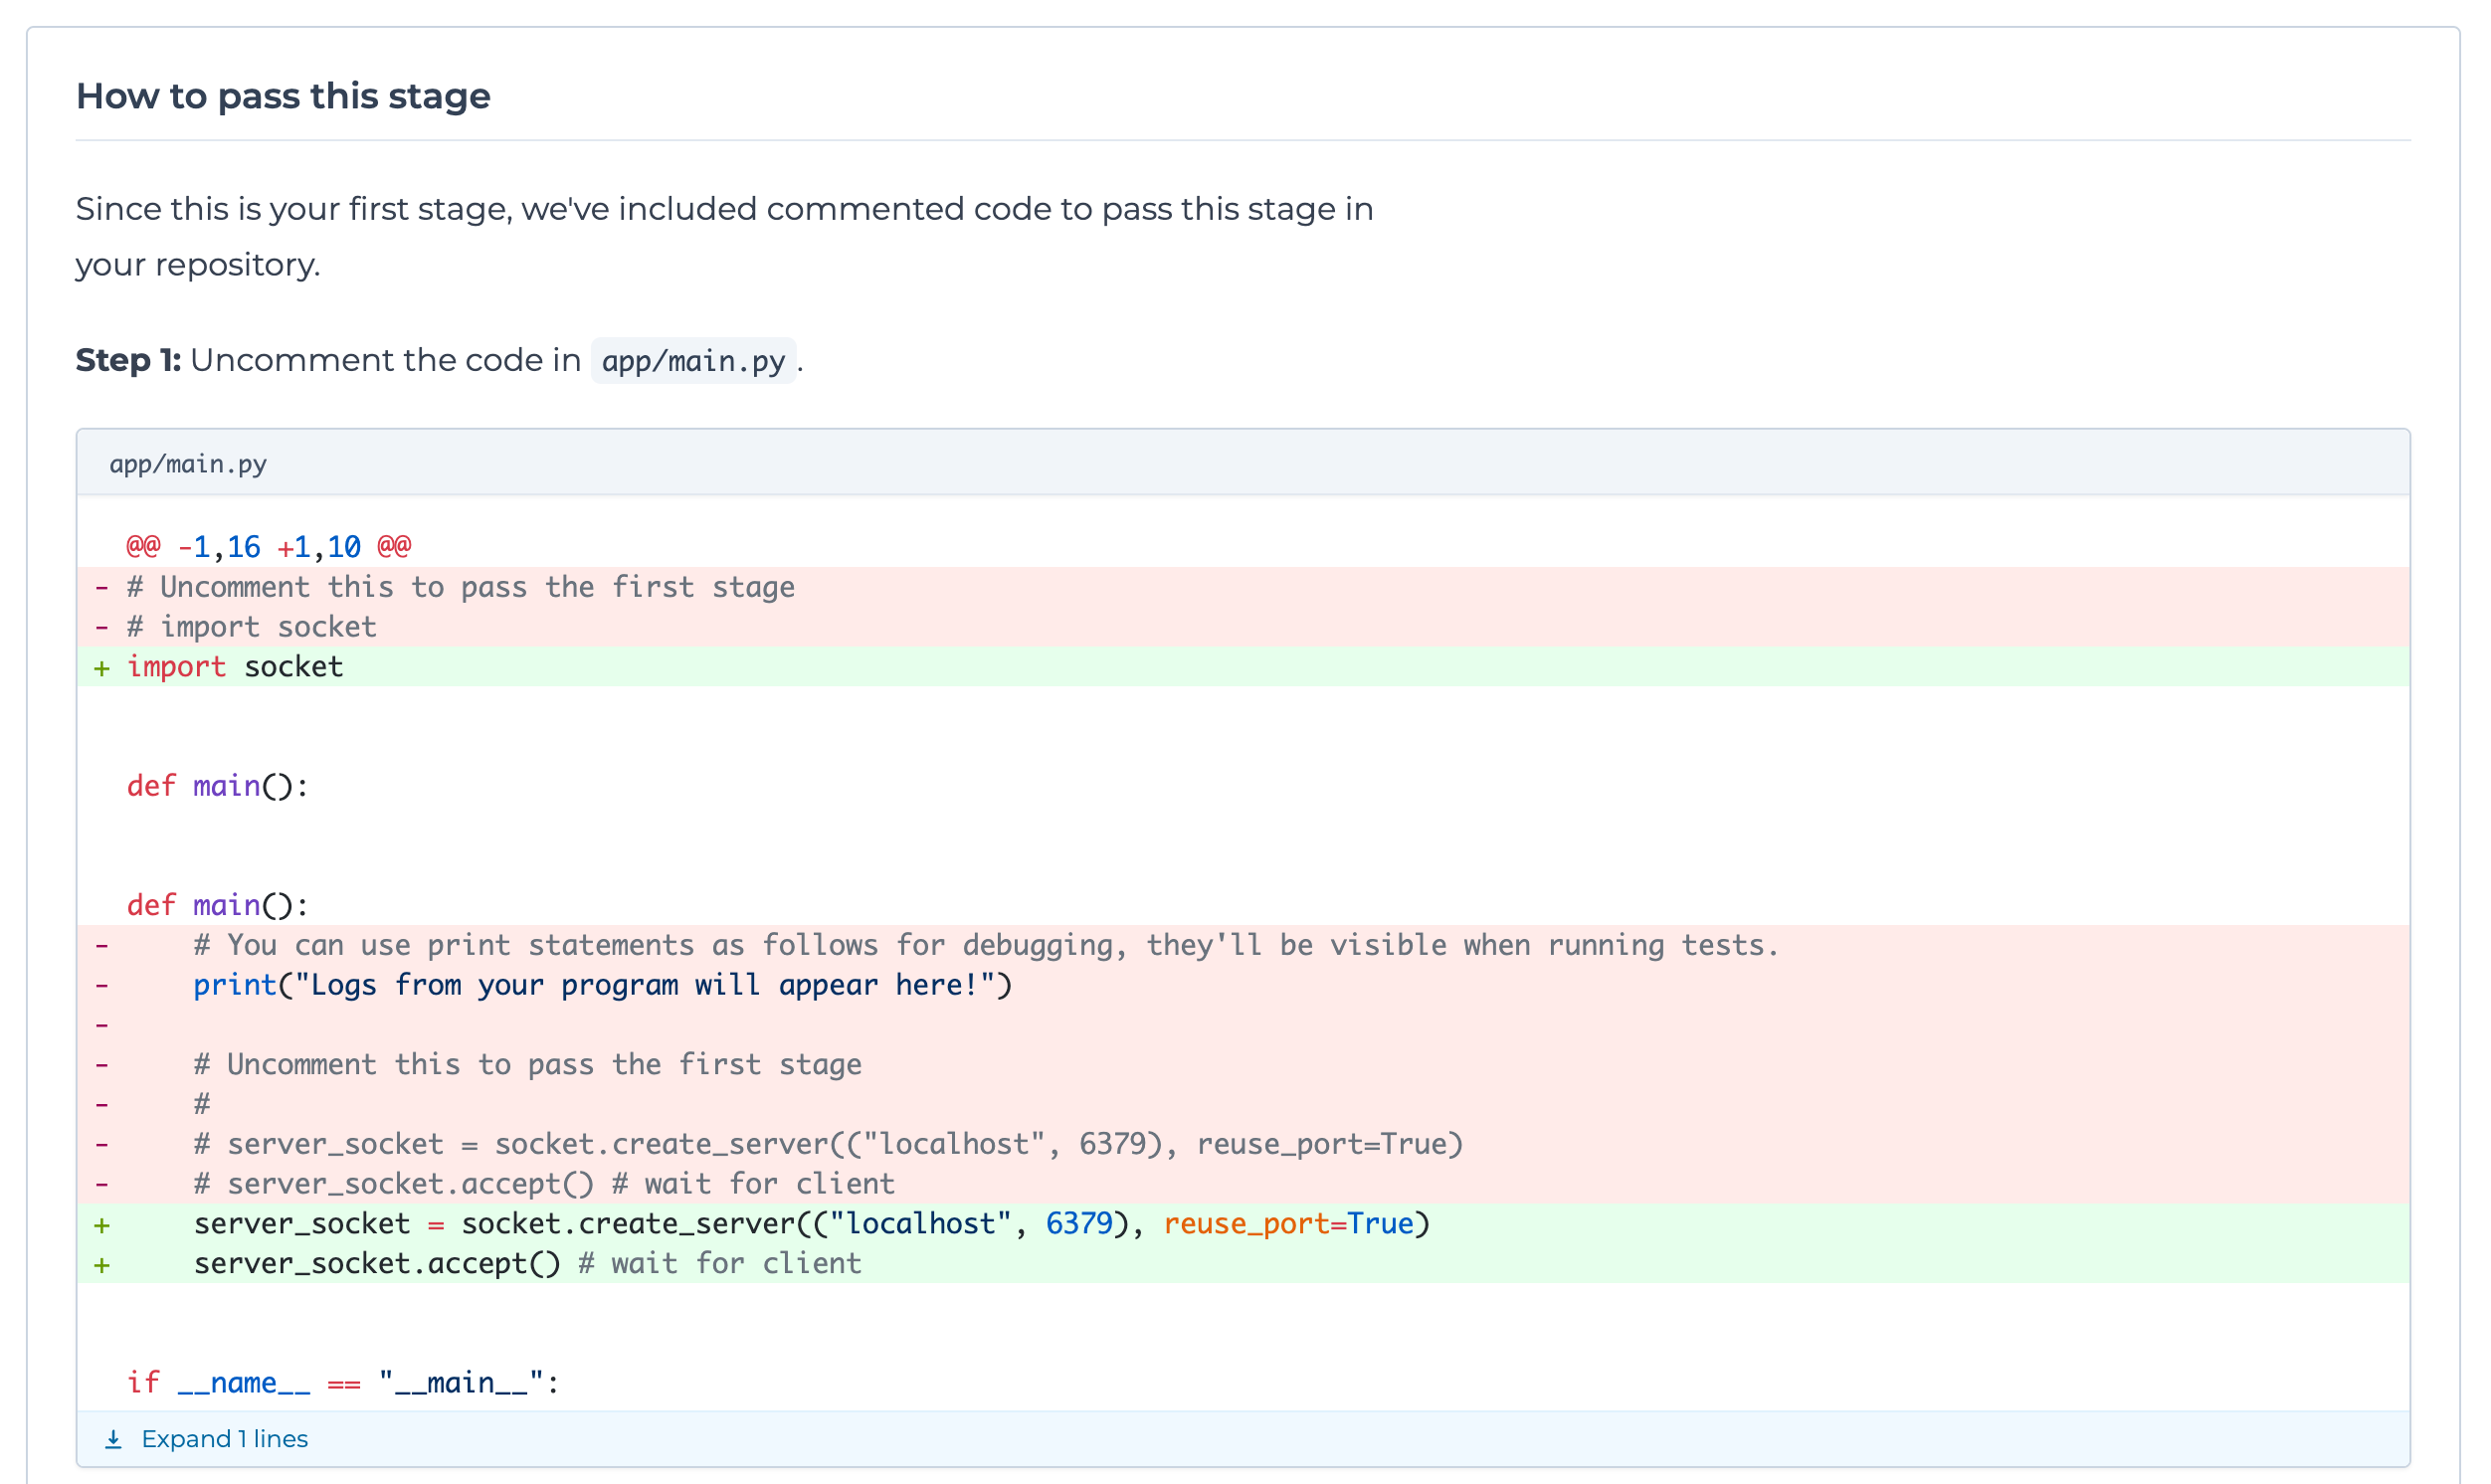
To make it easier for users to get started, we automatically generate a solution to the first stage of the challenge. This is done by uncommenting lines in the starter code. Example: